It was a few weekends ago now, while spending the day watching Audrey Hepburn films (and generally avoiding doing anything that could be considered as useful) that I was reminded of the wonderfully eccentric sleep mask that Audrey wears in 'Breakfast at Tiffany's'.
After spending a dreary bank holiday in a, cold and very damp tent in Norfolk, lying wide awake by 5.30am every morning due to the light streaming through the thin layer of canvas, I realised I need a sleep mask so that I could stay sound asleep and warm for as long as possible.
After spending a dreary bank holiday in a, cold and very damp tent in Norfolk, lying wide awake by 5.30am every morning due to the light streaming through the thin layer of canvas, I realised I need a sleep mask so that I could stay sound asleep and warm for as long as possible.
Having been obsessed by the sleep mask Audrey Hepburn wears in 'Breakfast at Tiffany's' since I was a child I decided to make The Holly Sleep Mask. The Pattern is definitely inspired by, rather than a copy of the mask Audrey wears, but is just as fabulous and best of all is really easy to make plus it will bring a touch of Glamour to even the coldest of mornings.
1. Cut your fabric to 1"x 24". Fold in half (right-sides together) and give a blast with the iron.
2. Sew down the length and across both ends.
3. Fold the fabric in half (each tie will be 12" long) and cut across the fold.
4. Using a blunt pencil or the back end of a knitting needle, turn each tie the right-way out.
5. Stitch over the raw end to stop it fraying inside the mask once attached.
1. Fold your outer fabric in half (right-sides together) and give it a quick blast with the iron, this is really useful when using a shiny fabric such as satin as it build up a bit of static which, stops it slipping around as much.
2. Pin the pattern to the fabric and cut making your cut line a little larger than the pattern by aprox. 1/2 cm.
3. Pin and cut out the padding fabric cut this to the same sizes as the pattern.
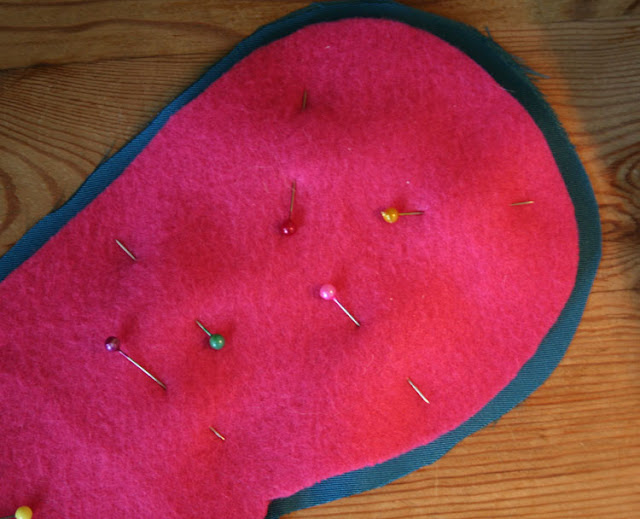
4. Keeping the two outer pieces right sides together pin the padding fabric on to the top.
 5. Stitch around the edge of the padding fabric leaving a gap on the left and right sides (this is where the straps will go).
6. Trim the outer fabric close to the sewn line and then zig zag around the edge, following the same line as the straight stitching.
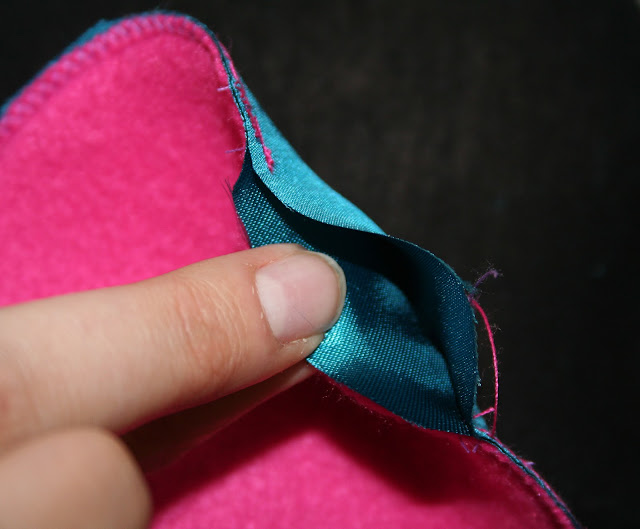
7. As carefully as possible, turn the mask the right way out, try avoid pulling too much as it may fray the outer fabric.
8. Insert the raw end of each side strap in to the gap, turn the edges in so that you have a smooth edge and pin closed.
9. Sew over the gap either by hand or on the machine - the brocade will cover this stitching so it wont be visible.
10. Pin your brocade around the front of the mask starting at the nose arch. Once you have got back to where you started, leave a small bit to tuck under to stop it fraying.
11. Hand sew your brocade to your mask with a matching thread. Making sure that the ends are tucked in neatly then your done!
If you did want to make your mask more like the original, I am sure it would be quite easy to do, following the same pattern but using a light blue felt for the main fabric, use felt triangles for the eyelids with a large glass beads underneath and use gold Ric Rac for the brows and trim!!
~ The Holly Sleep Mask ~
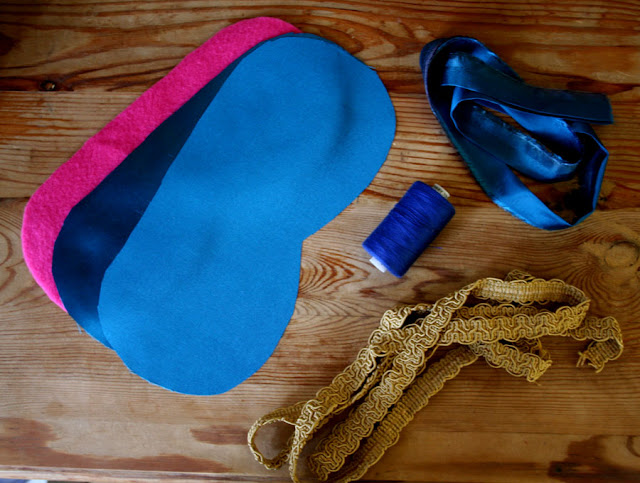
Ingredients:
The template Found Here
Outer Fabric - I used a cheap blue satin.
Matching thread
1" x 24" wide strip of Fabric or length of ribbon (for the ties)
Padding - Thick Felt, fleece or wadding
1/2 Meter of Brocade, Ric Rac or Ribbon
1. Cut your fabric to 1"x 24". Fold in half (right-sides together) and give a blast with the iron.
2. Sew down the length and across both ends.
3. Fold the fabric in half (each tie will be 12" long) and cut across the fold.
4. Using a blunt pencil or the back end of a knitting needle, turn each tie the right-way out.
5. Stitch over the raw end to stop it fraying inside the mask once attached.
1. Fold your outer fabric in half (right-sides together) and give it a quick blast with the iron, this is really useful when using a shiny fabric such as satin as it build up a bit of static which, stops it slipping around as much.
 |
| Padding Pinned to Outer Fabric |
2. Pin the pattern to the fabric and cut making your cut line a little larger than the pattern by aprox. 1/2 cm.
3. Pin and cut out the padding fabric cut this to the same sizes as the pattern.
4. Keeping the two outer pieces right sides together pin the padding fabric on to the top.
 5. Stitch around the edge of the padding fabric leaving a gap on the left and right sides (this is where the straps will go).
6. Trim the outer fabric close to the sewn line and then zig zag around the edge, following the same line as the straight stitching.
 |
| Gap left to turn right-side out |
7. As carefully as possible, turn the mask the right way out, try avoid pulling too much as it may fray the outer fabric.
8. Insert the raw end of each side strap in to the gap, turn the edges in so that you have a smooth edge and pin closed.
9. Sew over the gap either by hand or on the machine - the brocade will cover this stitching so it wont be visible.
10. Pin your brocade around the front of the mask starting at the nose arch. Once you have got back to where you started, leave a small bit to tuck under to stop it fraying.
 |
| Pined and ready to be hand sewn. |
Now your ready to sleep in till noon and then have your breakfast (well lunch) at Tiffany's!!
Wendy x


